Mini GuestBook
Maybe you've learned Hello, Uliweb this tutorial, and have some sense to Uliweb, so, let's step into database world together, and see how to use database simply.
Prepare
There is already the whole GuestBook source code in uliweb-tests project. So you can checkout from it:
svn checkout http://uliweb-tests.googlecode.com/svn/trunk/guestbook guestbook
cd guestbook
uliweb runserver
Enter http://localhost:8000/guestbook in the browser, then you'll find it. By default, it'll use sqlite3, so if you are using Python 2.5, you'll not need to install sqlite Python binding module. Or you need to install pysqlite2 package yourself. For now, Uliweb uses SqlAlchemy for underlying database driven module, it already supports many database, such as: mysql, sqlite, postgresql, etc. Before you want to use other databases, you should also install their database module first.
Ok, let's begin to write code.
Create Project
I suggest that you begin your work in a new directory, for example:
uliweb makeproject guestbookSo it'll export all necessary Uliweb source code to outputdir directory. Then goto this directory, ready to begin.
Create App
Goto the project directory built in previous step, and use makeapp to create a new app.
cd samples
uliweb makeapp GuestBook
This will automatially create a GuestBook app for you in apps directory of your project.
Configure Database
In this tutorial we'll use Uliweb orm to access database. And there is also a builtin orm app, so that you can use it directly. Just editing guestbook/apps/settings.ini, then change the INSTALLED_APPS to:
INSTALLED_APPS = [
    'uliweb.contrib.orm',
    'GuestBook',
    ]
Then add following content:
[ORM]
CONNECTION = 'sqlite:///guestbook.db'
So the settings.ini will look like:
[GLOBAL]
DEBUG = False
DEBUG_CONSOLE = False

INSTALLED_APPS = [
    'uliweb.contrib.orm',
    'GuestBook',
    ]

[ORM]
CONNECTION = 'sqlite:///guestbook.db'
ORM.CONNECTION is the connection string of orm, it's the same as SQLAlchemy package, the generic format will look like:
provider://username:password@localhost:port/dbname?argu1=value1&argu2=value2For Sqlite, the conntection is somewhat different:
sqlite_db = create_engine('sqlite:////absolute/path/to/database.txt')
sqlite_db = create_engine('sqlite:///d:/absolute/path/to/database.txt')
sqlite_db = create_engine('sqlite:///relative/path/to/database.txt')
sqlite_db = create_engine('sqlite://')  # in-memory database
sqlite_db = create_engine('sqlite://:memory:')  # the same
Here we use relative path format, so the guestbook.db will be created at guestbook folder.
Template Environment Extension
Because we want to enable user input plain text and output them as HTML code, so we'll use uliweb.utils.text2html function to convert text to HTML code, and we can indeed import this function in template file, but we can also bind prepare_view_env dispatch point, and inject a text2html function object to template environment, so that you can use text2html directly in template. Open GuestBook/__init__.py and adding below codes:
from uliweb.core.dispatch import bind

@bind('prepare_view_env')
def prepare_view_env(sender, env, request):
    from uliweb.utils.textconvert import text2html
    env['text2html'] = text2html
This is a dispatch receiver function usage example, and there are some others plugin hook you can use. And this hook point is global availabe, so other apps can also use it.
And we can also import text2html in template, so above just an example.
Prepare Model
Creating a models.py file in GuestBook directory, and add below code:
from uliweb.orm import *

class Note(Model):
    username = Field(CHAR)
    message = Field(TEXT)
    homepage = Field(str, max_length=128)
    email = Field(str, max_length=128)
    datetime = Field(datetime.datetime, auto_now_add=True)
It's easy now, right?
First, you should import something from uliweb.orm, and here import everything.
Then, you need to import datetime module. Why you need it? Because Uliorm supports two ways to define field:
- One way is using internal Python data type, e.g. int, float, unicode, datetime.datetime, datetime.date, datetime.time, decimal.Decimal, str, bool, etc. And I also extend some other types, such as: BLOB, CHAR, TEXT, DECIMAL. So you can use Python data type directly.
- The other way is using any Property class just like GAE, e.g. StringProperty, UnicodeProperty, IntegerProperty, BlobProperty, BooleanProperty, DateProperty, DateTimeProperty, TimeProperty, DecimalProperty, FloatProperty, TextProperty.
You should define your own model, and it should be inherited from Model class. Then you can define fields which you want to use. There is a handy function named Field(), you can pass it a Python data type, it'll automatically find a suit Property class for you.
class Note(Model):
    username = StringProperty()
    message = TextProperty()
    homepage = StringProperty()
    email = StringProperty()
    datetime = DateTimeProperty()
Each field may also has other arguments, for example:
- default
- max_length
- verbose_name
etc.
Fields like CharProperty and StringProperty should have max_length attribute, and if you don't give it, the default value will be 30.
Configure Model and Create Table
In Uliweb, you should configure all models in settings.ini, just like this:
[MODELS]
note = 'GuestBook.models.Note'
So you can save above configuration in GuestBook app settings.ini or apps/settings.ini, but in app's settings.ini is recommended, because it's more suitable for reuse of apps.
Then when can run:
uliweb syncdbin project directly. So that uliweb will automatically create tables for you.
Static Files Serving
We'll need to display static files later, now we can just add uliweb.contrib.staticfiles to INSTALLE_APPS of settings.ini. Using this app, all static directories of available apps will be processed as static folder, and the URL link will start begin with /static/. Now the settings.ini will look like:
[GLOBAL]
DEBUG = False
DEBUG_CONSOLE = False

INSTALLED_APPS = [
    'uliweb.contrib.orm',
    'uliweb.contrib.staticfiles',
    'GuestBook',
    ]

[ORM]
CONNECTION = 'sqlite:///guestbook.db'
As soon as you've added uliweb.contrib.staticfiles, you can call url_for_static() in views or template. This function will create url for files in static folder of each App.
Display Comments
Change index() function in view
Open views.py in GuestBook directory, and change it to:
#coding=utf-8
from uliweb import expose, functions

@expose('/')
def index():
    Note = functions.get_model('note')
    notes = Note.all().order_by(Note.c.datetime.desc())
    return {'notes':notes}
In beginning, we import expose and functions function, then we can use functions.get_model() to get real note Model class according the settings.ini. And we can get all comments in index() via Note.all() statement. In order to display the comments descend to datetime, we add order_by() clause. This is SqlAlchemy query expression usage.
Here are some simple usages:
notes = Note.all()                          #Gain all records, with no condition
note = Note.get(3)                          #Gain records with id equals 3
note = Note.get(Note.c.username=='limodou') #Gain records with username equals 'limodou'
Then we'll return {'notes':notes}. Remember, when you return a dict variable, Uliweb will automatically find a matched template to render the HTML page.
Create Layout Template File
I don't want to repeat myself again, because I've already made a YAML layout template file before, and it's in uliweb.contrib now, so you can also use this CSS framework to get beautiful representation.
Create a base.html file in GuestBook/templates directory, the content should be:
{{extend "yaml_base_layout.html"}}
{{block nav}}{{end}}
{{block topnav}}{{end}}
{{block header}}<h1><a href="{{=url_for('GuestBook.views.index')}}">
Uliweb Guest Book</a></h1>{{end}}
So you can see, we extend yaml_base_layout.html template, and override some blocks defined in parent template. Here we use url_for to get reversed URL according the view function name.
Create index.html Template File
Create a index.html file in GuestBook/templates directory, it'll be matched to index() function. And add below content to it:
1     {{extend "base.html"}}
2     {{block content}}
3     <h2><a href="{{=url_for('GuestBook.views.new_comment')}}">New Comment</a></h2>
4     {{for n in notes:}}
5           <div class="info">
6           <h3><a href="{{= url_for('GuestBook.views.del_comment', id=n.id) }}">
7           <img src="{{= url_for_static('delete.gif') }}"/>
8           </a> {{=n.username}} at {{=n.datetime.strftime('%Y/%m/%d %H:%M:%S')}} say:</h3>
9           <p>{{<<text2html(n.message)}}</p>
10          </div>
11    {{pass}}
12    {{end}}
The first line means this template will inherit from base.html.
And {{block content}} means that we'll override the "content" block defined in parent template. But you may ask, why I haven't seen the "content" block definition in base.html. Because it's defined in yaml_base_layout.html.
Line 3 will display an URL for add new comment.
Line 4 tills line 11 are a loop. Remember Uliweb uses web2py template module, but makes some improvements. The code between {{}} can be any Python code, so they should follow the Python syntax. Thus, the : at the end of block statement can't be omitted. You can also put html code in {{}}, but can't use them directly, you should output them using out.write(htmlcode). When the block is ended, don't forget to add a {{pass}} statement. And you don't need to worry about the indent, Uliweb will reindent for you, as long as you add the correct pass statement.
In loop, it'll process the notes object, and then display a delete link, and then user info and user comments.
Have you seen {{<<text2html(n.message)}}? It uses text2html function which we defined in init.py to convert plain text to html code.
Ok, after above working, displaying comments is finished. But for now, you can't add comment yet, so let's see how to adding comment.
Add comment
Add new_comment() function to view
In the index.html, we've already add some code to create New Comment URL:
<a href="{{=url_for('GuestBook.views.new_comment')}}">New Comment</a>You can see, I use url_for to create reversed URL. url_for we've covered before, the only thing you need notice here is the function named new_comment, so we need to create such function in views.py.
Open the views.py file, and add below code:
1     @expose('/new')
2     def new_comment():
3         from forms import NoteForm
4         import datetime
5
6         form = NoteForm()
7         if request.method == 'GET':
8             return {'form':form, 'message':''}
9         elif request.method == 'POST':
10            flag = form.validate(request.params)
11            if flag:
12                Note = functions.get_model('note')
13                n = Note(**form.data)
14                n.save()
15                return redirect(url_for(index))
16            else:
17                message = "There is something wrong! Please fix them."
18                return {'form':form, 'message':message}
The URL will be /new for new_comment() function.
Line 3 will import NoteForm, what's it? It's a form class, we can use it to validate data, and even output HTML form code. I'll introduce it later.
Line 6 will create an instance from NoteForm.
According to request.method is GET or POST, we can decide to execute different process. For GET method, we'll display an empty Form, for POST method, it means user has submitted data, and need to be processed. And for GET, it also means read operation, for POST, it means write operation.
Line 8, we'll pass a dict to template, and it'll show and empty Form page.
If the request.method is POST, we'll invoke form.validate(request.params) to validate submitted data by user. And if you want only validate request.POST, you can only pass request.POST to validate() function. It'll return the validation result, if True, it means the validation is successful. And the submitted data will be parsed to Python data type, and be bound to relative Form fields.
If you want to access certain field, you can use form.field.data to get the parsed value. And if you want to get all data, you can use form.data. And if the validation is failed, the error message will also be bound to each field.
Then we can invoke n = Note(**data) to create a new Note record, after that the new Note object is not be insert into database yet, so you need to invoke n.save() or n.put() to commit it.
Then, we will invoke return redirect to jump another page, it's the homepage of GuestBook. Here we use url_for again to create reversed URL. And this time we use index() function object but not function string.
If the validation is failed, the flag variable should be False. We'll assign an error message to message variable, then show the form again.
Define Form
In order to interact with server, uesr can through browser to input data, so you should provide Form HTML element to receive the input data. For an experienced web developer, he can write HTML code manually, but it's difficult for newbies. And you should also think about how to deal with error, data format conversion, etc. So many frameworks provide such Form helper tool, Uliweb also provides such thing. The Form module will be used for this.
Creating a forms.py file in GuestBook directory, then add below code:
from uliweb.form import *

class NoteForm(Form):
    message = TextField(label='Message:', required=True)
    username = StringField(label='Username:', required=True)
    homepage = StringField(label='Homepage:')
    email = StringField(label='Email:')
First, importing Form module. For now, Uliweb supports several form layout, one is table layout which uses table tag, other is css layout which uses div tag. And another will use div tag, but suit for YAML CSS framework. The default layout is just yaml form layout.
Then, we'll create NoteForm class, here I define 4 fields, each field maps a type. For example, TextField means multilines text input, StringField means single line text input, and you can also use: HiddenField, SelectField, FileField, IntField, PasswordField, RadioSelectField, etc.
Maybe you've seen that, some of these fields have type, e.g. IntField, so it'll be automatically convert submitted data to Python data type, and convert back when creating HTML code.
Each field may has some arguments, for example:
- label used to display a label tag
- required if a field can't be empty
- default default value
- validators used to validate the data
It likes the definition of Model, but they are different.
Create new_comment.html Template File
Creating a new_comment.html file in GuestBook/templates directory, then add beclow code:
{{extend "base.html"}}
{{block content}}
{{if message:}}
    <p class="warning">{{=message}}</p>
{{pass}}
<h1>New Comment</h1>
<div class="form">
{{<<form}}
</div>
{{end}}
First line is {{extend "base.html"}}, it means that you'll extend from base.html template file.
Next it'll override content block.
Next is a if statement, it'll test if the message is not empty, if not, then display it. Notice the : at the end of the line. And here we use class="warning", this CSS class also comes from YAML.
Then display form element, here I used {{<<form}}. Because we don't want the form code be escaped, so we need to use {{<<}} tag.
Now, you can try current work in the browser.
Delete Comment
In index.html, we've defined a link which will be used to delete comment, the format is:
<h3><a href="{{= url_for('GuestBook.views.del_comment', id=n.id) }}">So let's implement it.
Open GuestBook/views.py file, and append below code:
@expose('/delete/<id>')
def del_comment(id):
    Note = functions.get_model('note')
    n = Note.get(int(id))
    if n:
        n.delete()
        return redirect(url_for(index))
    else:
        error("No such record [%s] existed" % id)
Delete is simple, first get the object according the id parameter passwd from view function. Note.get(int(id)) will get the object, then if the object existed, then call n.delete() to delete the record. Or display an error page.
URL Arguments Definition
Notice, here, expose() uses an argument, i.e. <id>. Once there are something like <type:para> in the URL, that's means you defined an argument. And type can be optional. Uliweb provides many builtin types, such as: int, float, path, any, string, uniocde. And you can find more details in URL Mapping document. If you just define <name> format, it just means matching something between //. Once you defined some arguments in the URL, you must define the same arguments in the view function, so del_comment() function should be written in del_command(id). There the id arugment is the same as the one in URL.
Ok, now you can try if the delete function can be used.
Error Page
When there are something wrong, you may need to show an error page to user, so you can use error() function to return an error page. return is no need in front of it, just give it an error message, that's enough.
How to create error template file? Just create a file named error.html in your app templates directory, and add something like:
{{extend "base.html"}}
{{block title}}Error{{end}}
{{block header}}<h1>Error!</h1>{{end}}
{{block content}}
<p>{{=message}}</p>
{{end}}
It's simple right, we extend from base.html, then override title block, header block and content block. And this page need a message variable.
Run
In previous developing procedure, you can also start a developing server to test your project. The command of starting a developing server is:
uliweb runserverWhen it starting, you can input http://localhost:8000/ to test this GuestBook demo.
Screen Casts
Let's see some screen casts, this will make more sense.
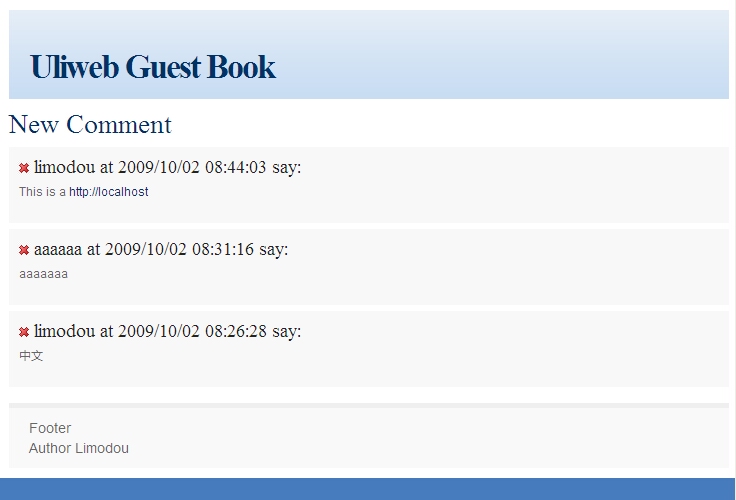
Homepage:
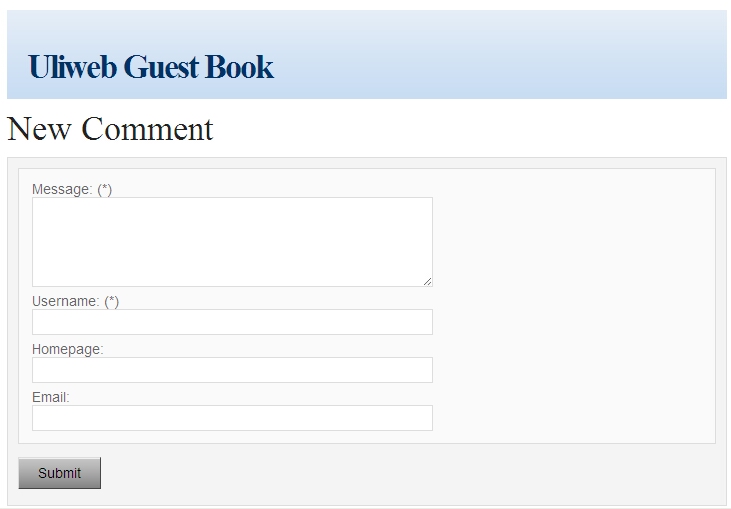
New Comment Page:
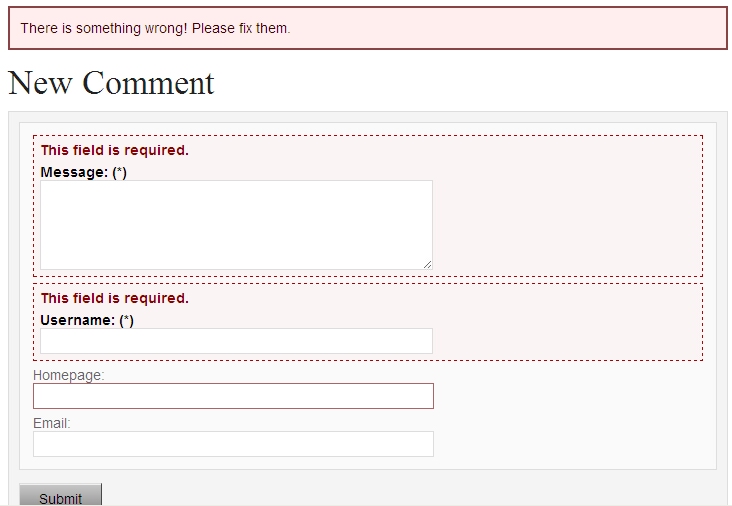
Error Comment Page:
Conclusion
Wow, we've learnt so many things for now:
- ORM usage, including: ORM initilization, Model definition, simple add, delete, query.
- Form usage, including: Form definition, Form layout, HTML creation, data validation, error process.
- Template usage, including: {{extend}} and {{block}} usage, add custom variables to template. environment, define variables in child template, write Python code in template.
- View usage, including: redirect usage, error usage, static files serving.
- URL mapping usage, including: expose usage, arguments definition.
- uliweb command line tool usage, including: makeproject, makeapp, runserver usage.
- Architecture knowledge, including: the organization of Uliweb, settings process. flow mechanism, the mapping between view function and template file.
Yes, there are too much things. However these are not the whole stuff of Uliewb yet. Along with the application becomes more complex, the functionalities of frameworks will be more and more. But I think a good framework should enable experienced developers build an environment which should be easy to use and easy to manage, then the others of this team could work under this environment, and the duty of those expericenced developers should to change to make this environment better and powerful. I hope Uliweb can step foward to this goal.
